Yum... Cake!
... Cakes are
almost "a must" at a picnic!
When you try these easy picnic cakes, you'll be surprised how simple they are to make and great
to make ahead for your picnic.
Couldn't you do with a slice of chocolate cake and a coffee right now!
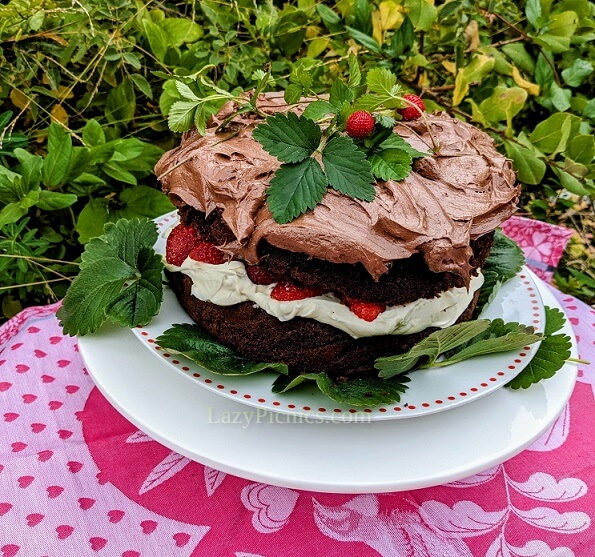
You'll be thrilled when you throw your easy picnic cake together, pop it in the oven...
then enjoy the delicious wafts of baking cake coming from the kitchen while you prepare the other food
and gather things for your picnic.
It's an easy run to the shop to buy a cake,
but there is something very satisfying about making your own and proudly taking it to your picnic!
Easy Picnic Cakes... start with these recipes below.
You'll only find easy recipes for baking here.

- Chocolate cake... made with black beans and dates
- A very special sponge cake... from my Mum
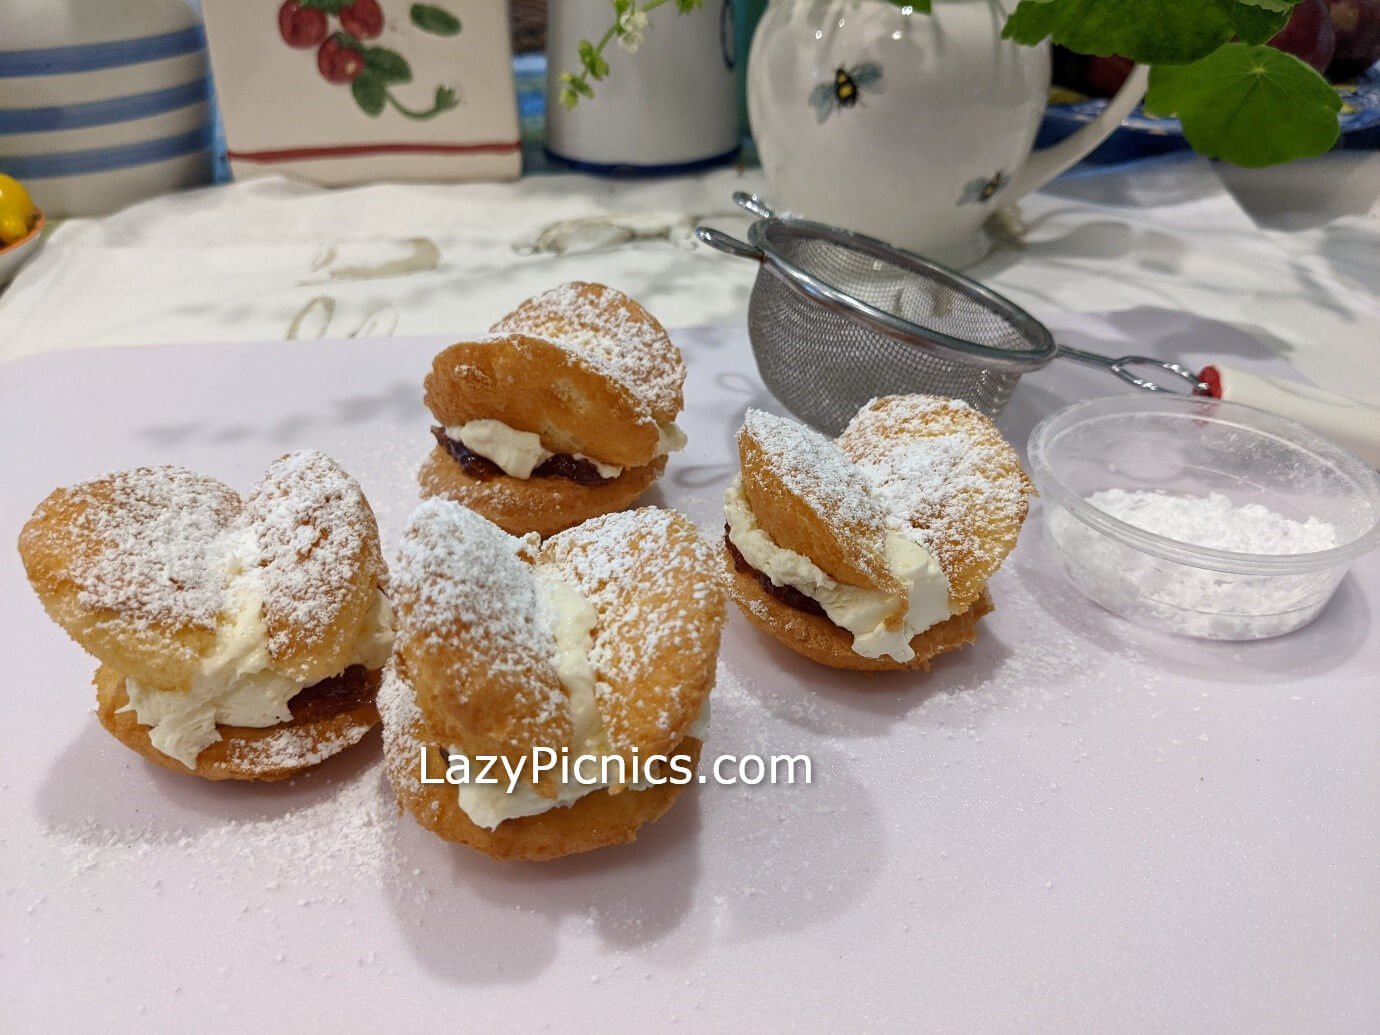
- Butterfly cakes... a bit of fun!
- An easy banana cake... an old family favorite that my family has often made
- Little cakes, or muffins, made with banana cake mixture
- Simple basic butter icing for cakes
- Cream Cheese Topping
- Recipe for whole orange and almond cake... very popular

When you "buy me a coffee" it is very much appreciated.
You’re supporting the development of this site…
while I hunt for new delicious recipes … and more cake for you!
So let's start with this chocolate cake...
without flour or sugar, it's an easy picnic cake made with the sweetness of dates.
It is a cake with dates!
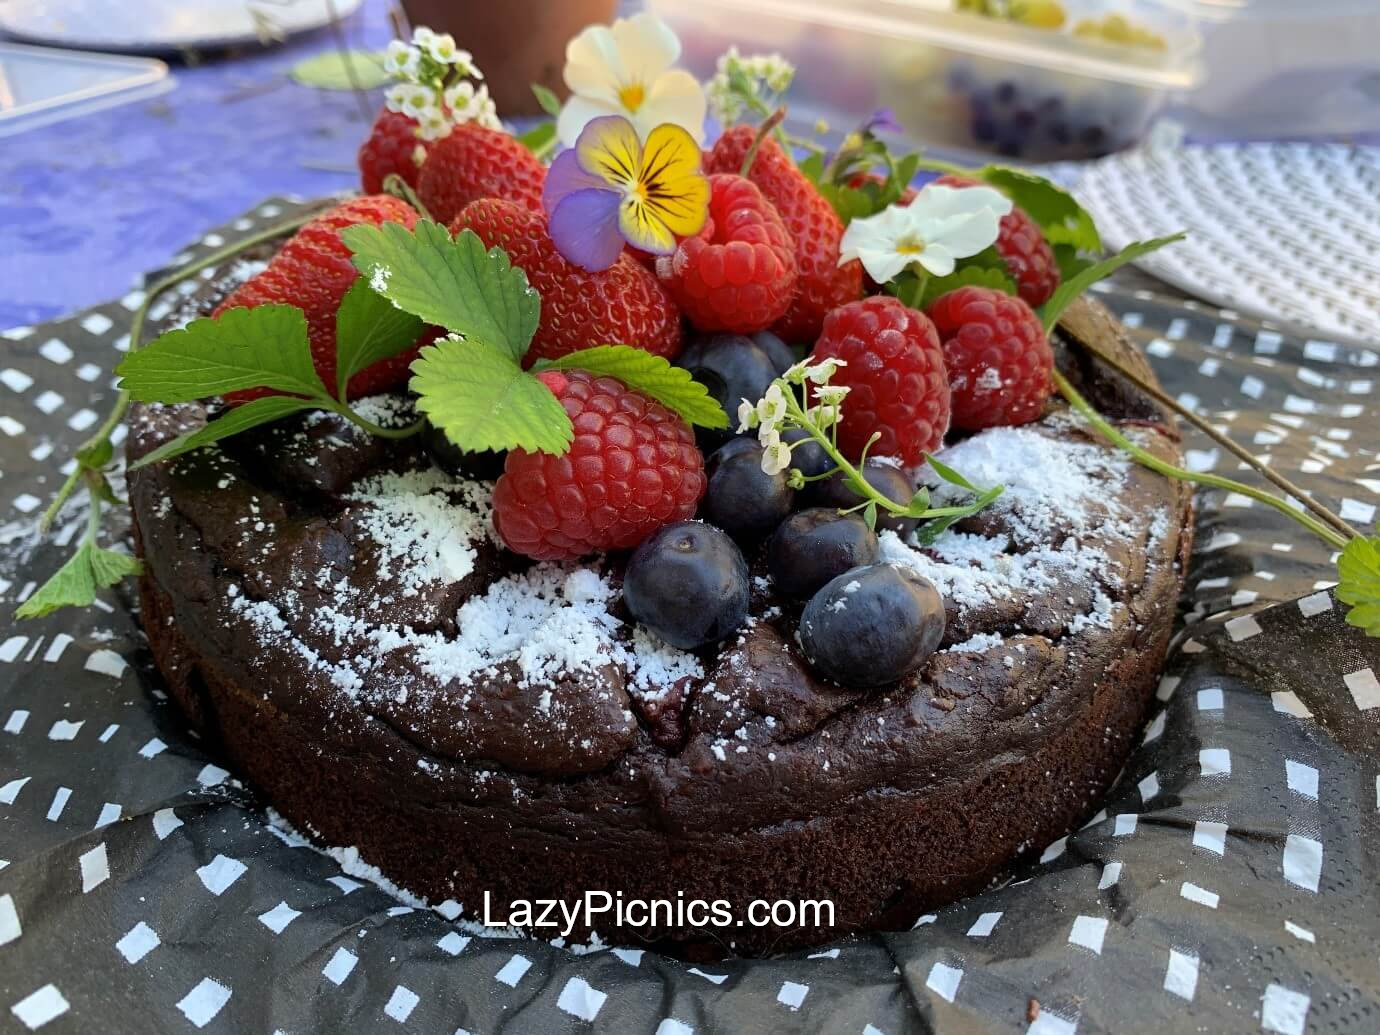
Make a lovely moist chocolate cake... for 10-12 people.
You will need to...
- Begin by heating oven to 180C, (160 fan forced), 350F
- Grease a deep 20cm round spring form cake tin. Line base with grease proof paper
Gather your ingredients for this easy picnic cake ...
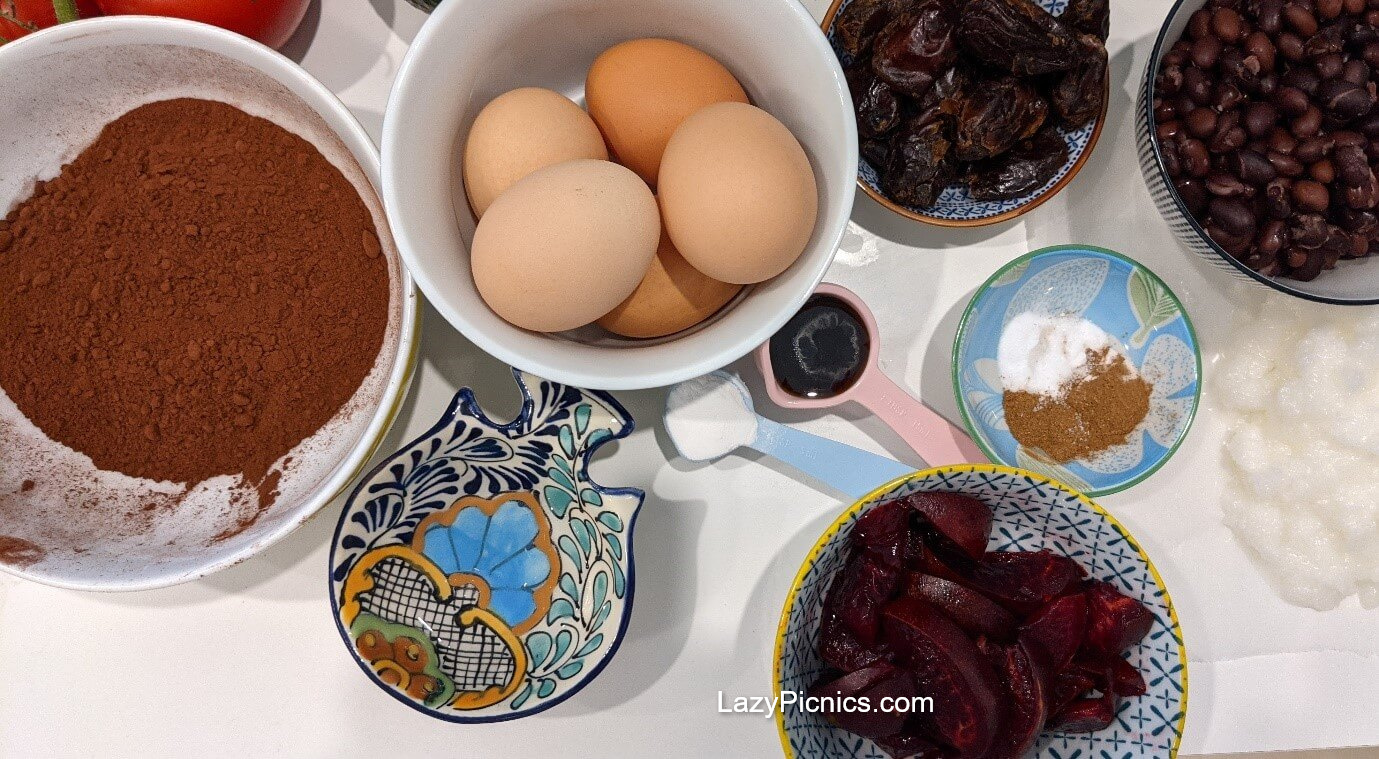
- 1x400g tin black beans... drained and rinsed well
- 15 soft fresh dates, pitted and roughly chopped... use
lovely moist dates, not the hard dry variety! If you do have dry dates,
just soak them in boiling water, drain to use in this easy picnic cake.
- 1 tabspn Vanilla extract
- 6 eggs
- 2 tabspns strong black coffee
- 150g coconut oil
- 60gm cocoa powder… ¾ cup
- ½ teaspoon carb. soda
- 1 teaspn baking powder
- ½ teaspoon ground cinnamon
- Pinch salt
- Approximately 150 g fresh fruit… plums or, pears, apricots or, strawberries and blueberries or, pitted cherries, raspberries, bananas... your choice!
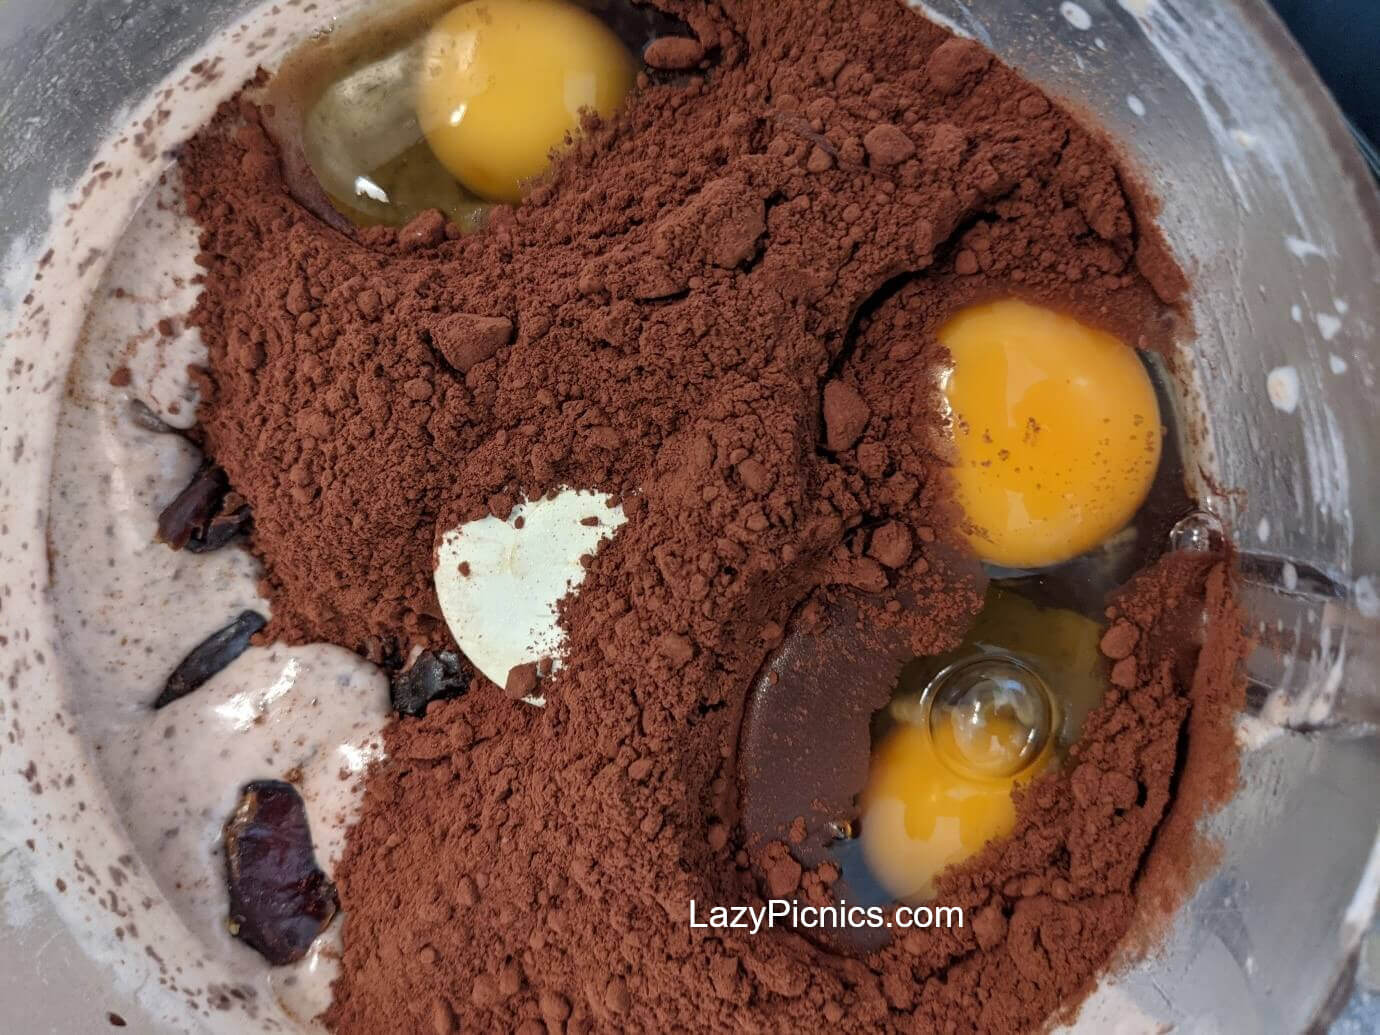
Method....
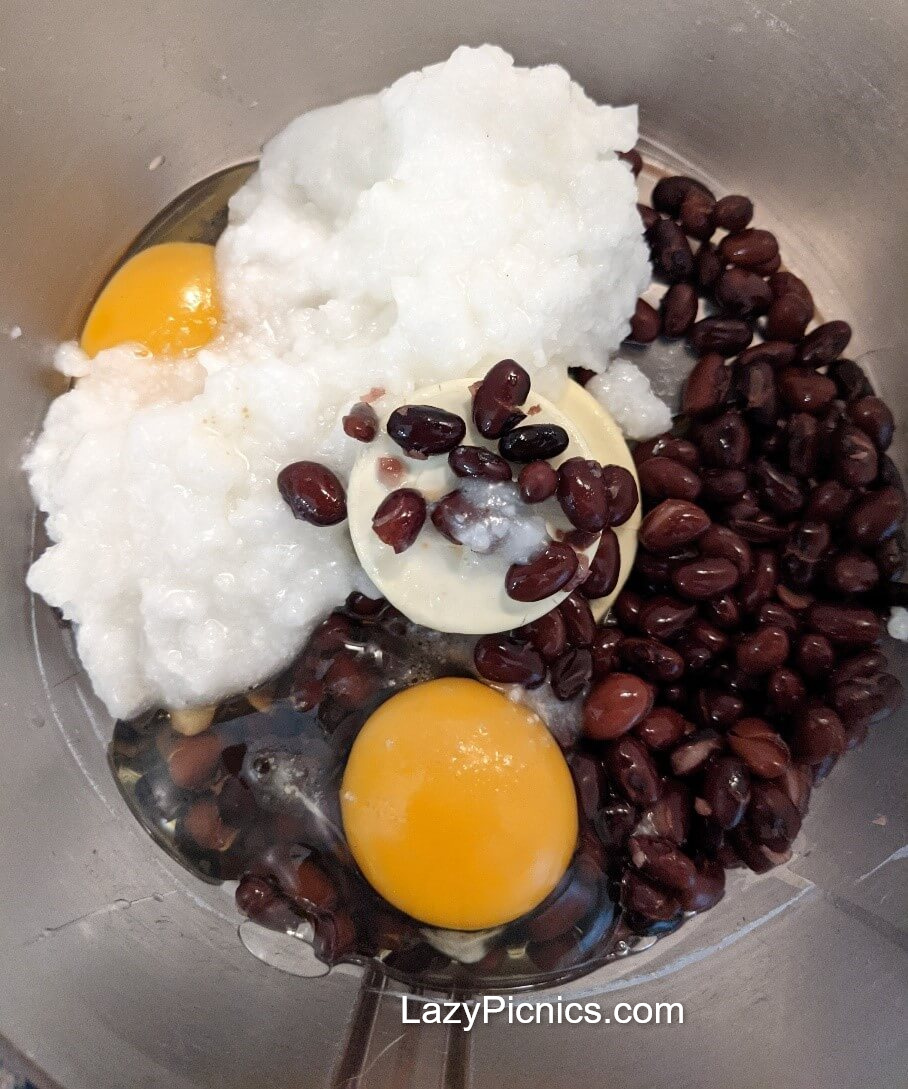
- Beat... beans, dates, vanilla, 3 eggs and coconut oil all together in a food processor, until finely chopped and smooth.
- Add remaining ingredients and beat together. This easy picnic cake will look quite moist at this stage.
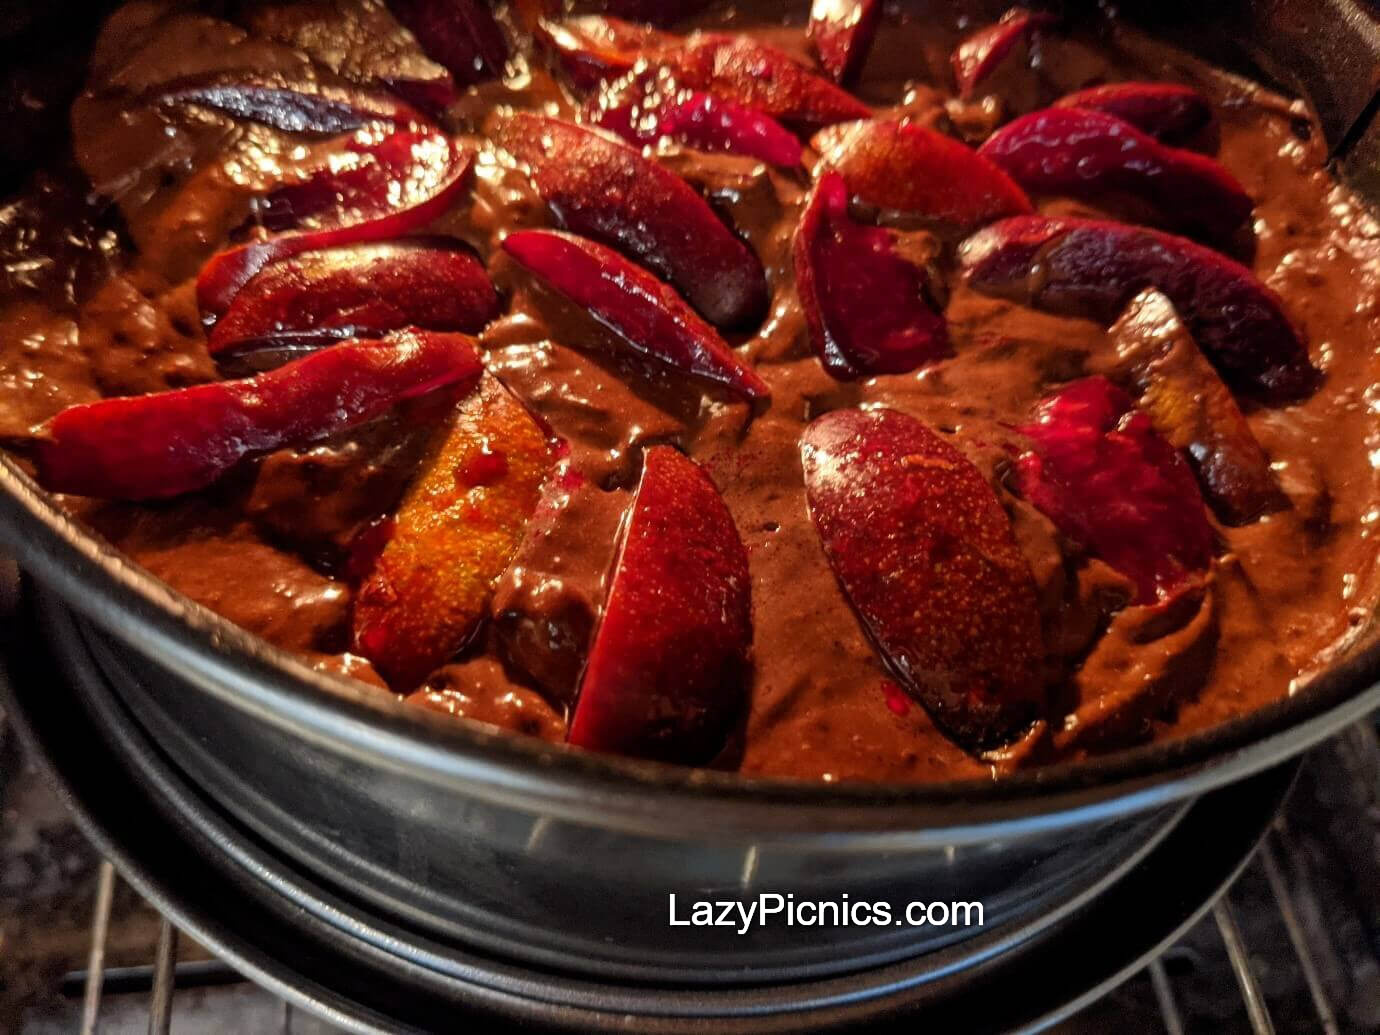
- Pour into spring form cake tin lined with grease proof paper.
- Place your chosen fresh fruit on top of the cake and push gently into the mixture. Plums, sliced, were used for this easy picnic cake. Our trees were laden with fruit and I just "had" to use them... and they were delicious... but you can use your favorite fruit.
- ... So, use approximately 150 g fresh fruit… plums or, pears, apricots, peaches or, strawberries and blueberries, pitted cherries or, raspberries, bananas, apples... your choice!
- Pop into the oven... 180C ( 160 fan forced) and cook for about 30min, or more if still very moist. Sometimes, depending on the fruit, it can be 10min or more, even longer!
- It will be very moist.
- This finished easy picnic cake looks cracked on the top, when cooked, but the cooked plums which are soft and delicious, sink in a little. It varies with the fruit you use.
Let the cake stand in the tin for 10 min, at least, after removing from the oven and before turning it out onto the cooling rack.
To decorate this easy picnic cake...
- You can use your favorite fresh fruit. I have used mine here... mixed berries, blueberries, raspberries and strawberries... just scatter across the top of the cake.
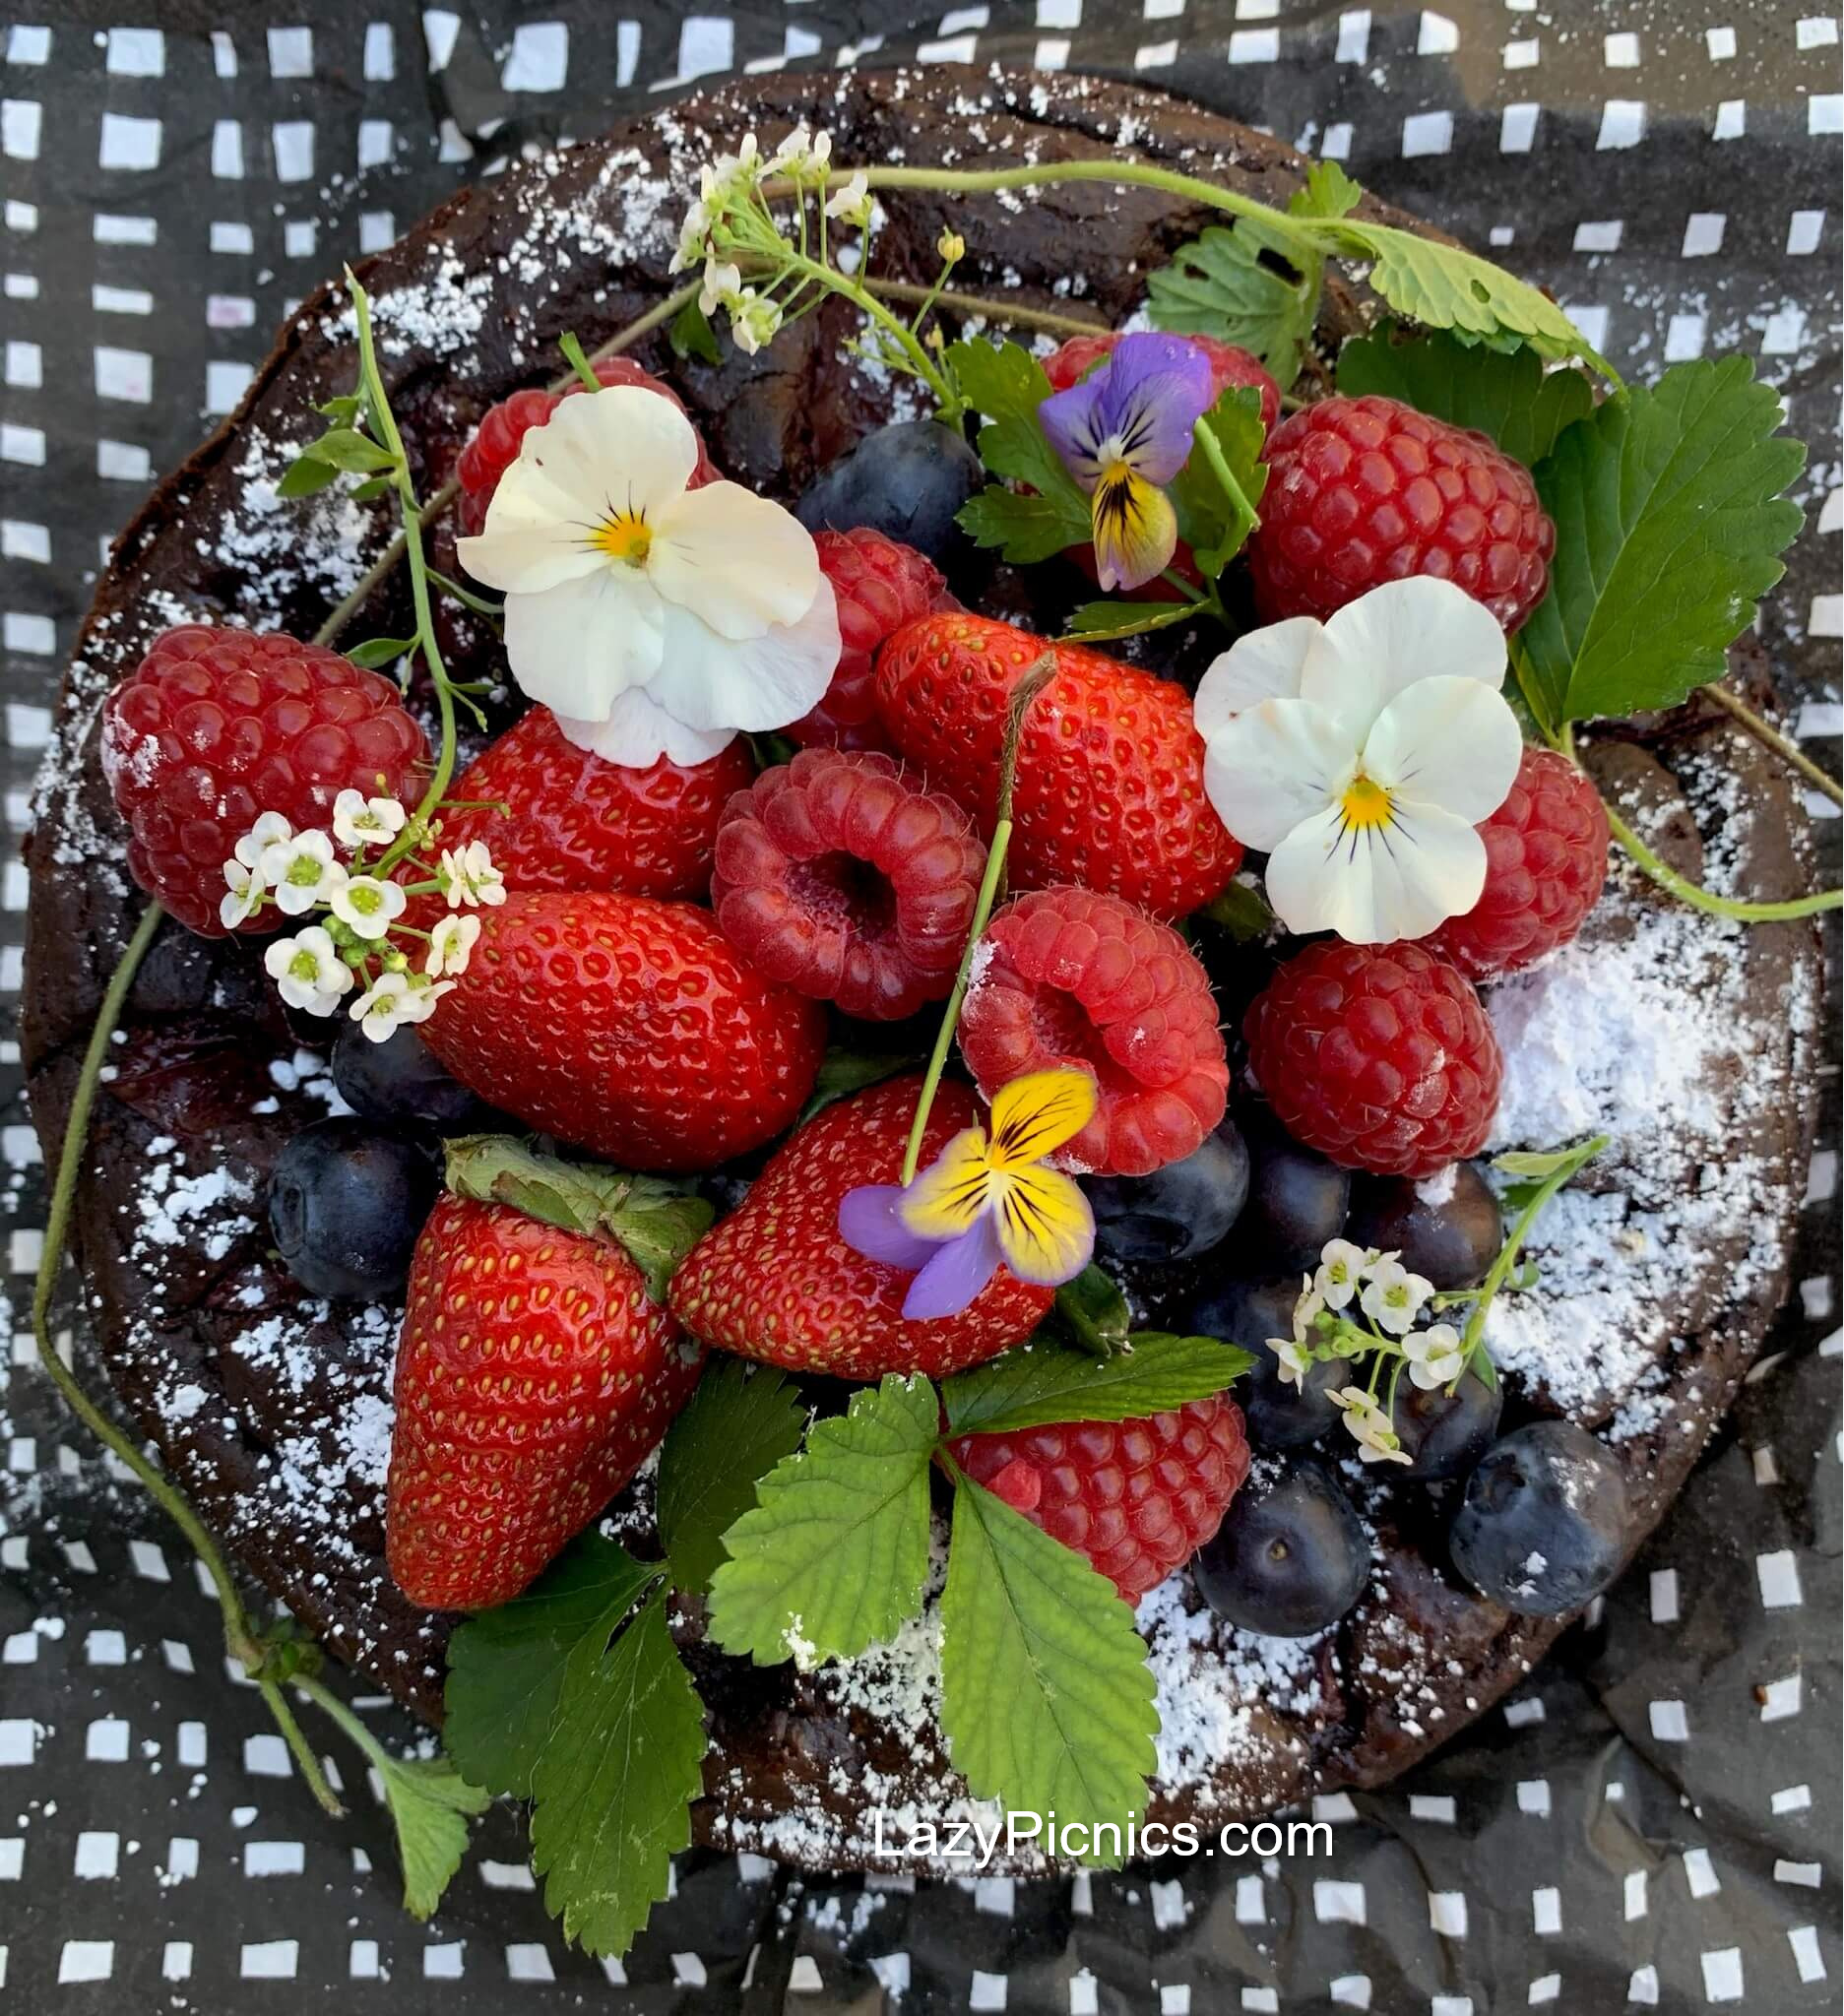
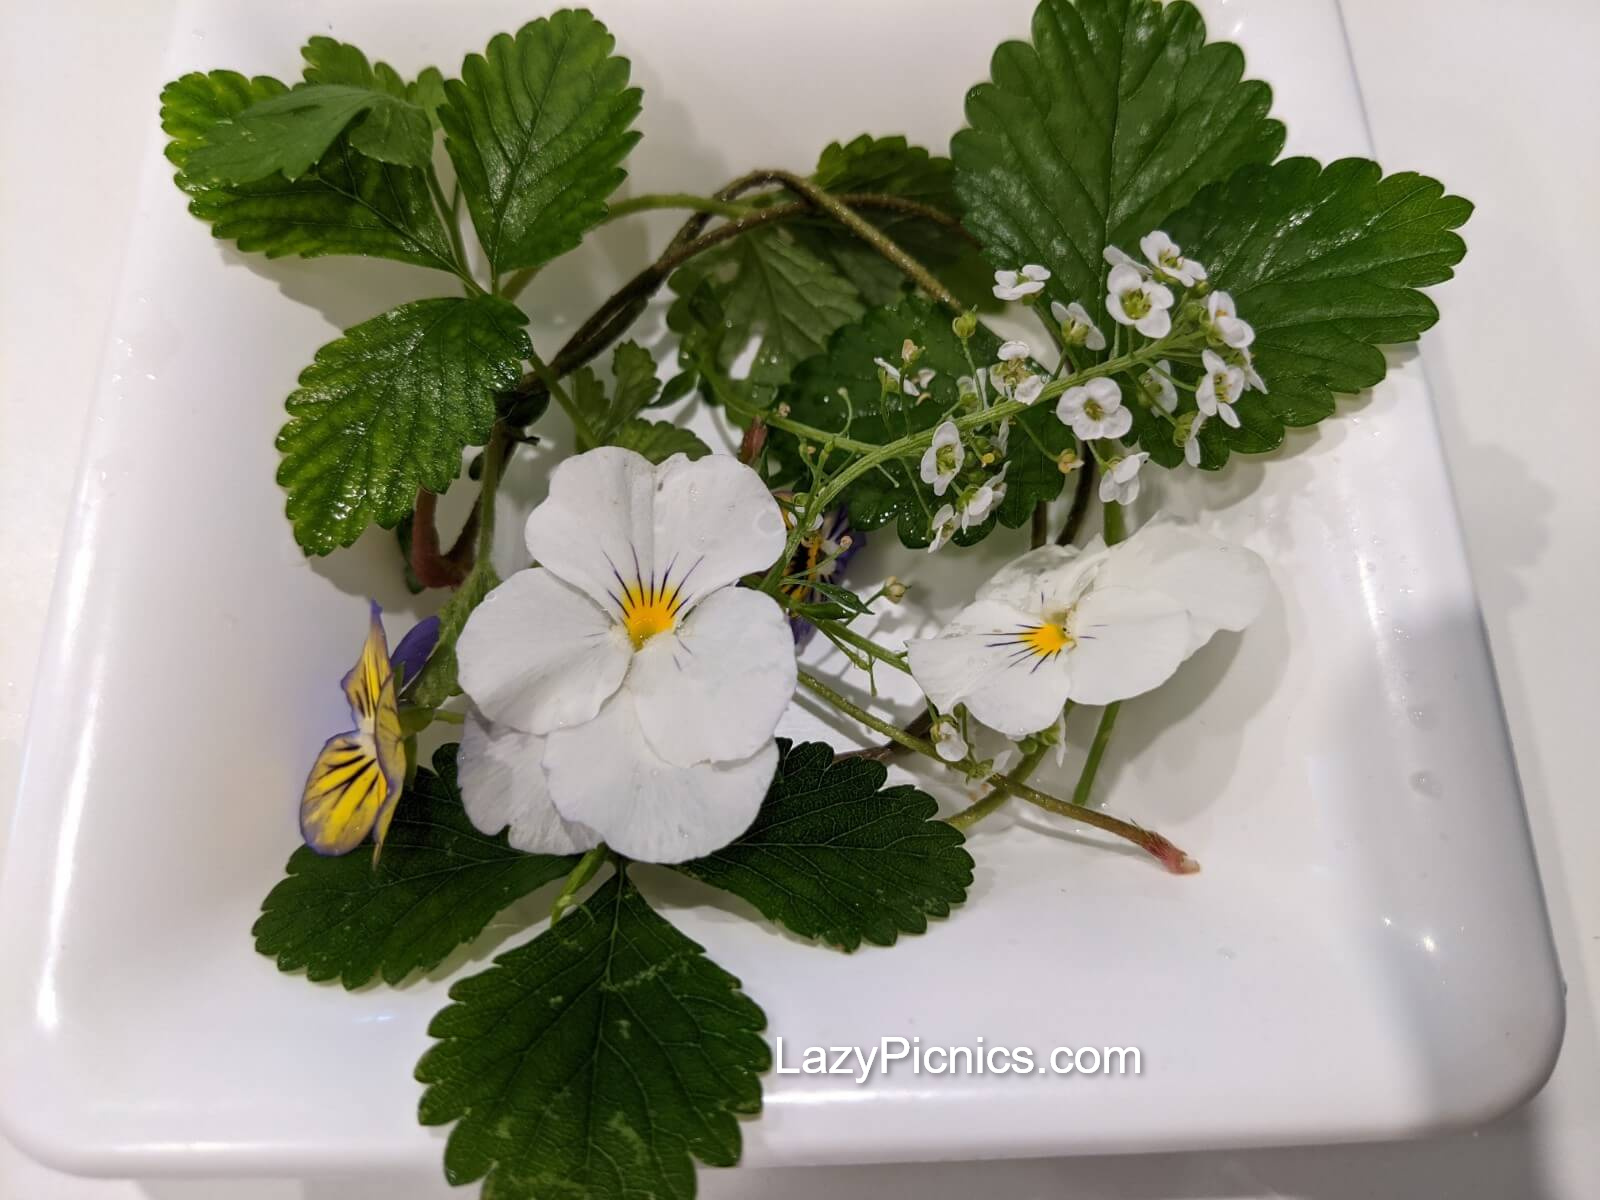
- Then scatter clean edible flowers amongst the fruit. Please make sure they are edible clean flowers, not sprayed with poisons! I took these to the picnic on a little plate, with a small amount of water to keep them fresh... and covered them in biodegradable plastic film. Could be in a reusable plastic container too. The berries and flowers and strawberry leaves, were put on the easy picnic cake at the picnic... it only takes a couple of seconds to do this.
- Give a light sprinkle/sift of icing sugar if you wish... it does look good and adds a little sweetness.
A good dollop of thickened cream... or yogurt...
is excellent to serve separately with this easy picnic cake!
TOP TIPS... other suggestions on how to use this mixture for an easy picnic cake.
- This recipe is also brilliant in a log tin... easier to cut at the picnic and can still look as stunning.
- It
can also be divided into a 10-12 muffin tin well buttered, for
individual little cakes. They will take less time to cook... 15 to 20
min. Decorate too!
- This cake can be used as a base for a trifle too. We made individual trifles to take to a last minute picnic for two... delish!
If you need to match the cake with your lunch ideas check here for ideas...
Looking through these suggestions will help you plan what to take to your picnic.
Now, a treat for you, another easy picnic cake... the very best, easy sponge cake recipe!
This is the sponge cake recipe used by my Mother, Nance.
Nance used this easy sponge cake recipe for many, many picnics in the bush.
It wasn't a proper picnic if we didn't have a sponge, or lovely fruit cake, made by my Mum.
Boil the billy for tea (as shown on the "My Story " page) and... bring out the sponge cake!
Nance was famous for
her light, moist, delicious sponge cakes.... the best ever!
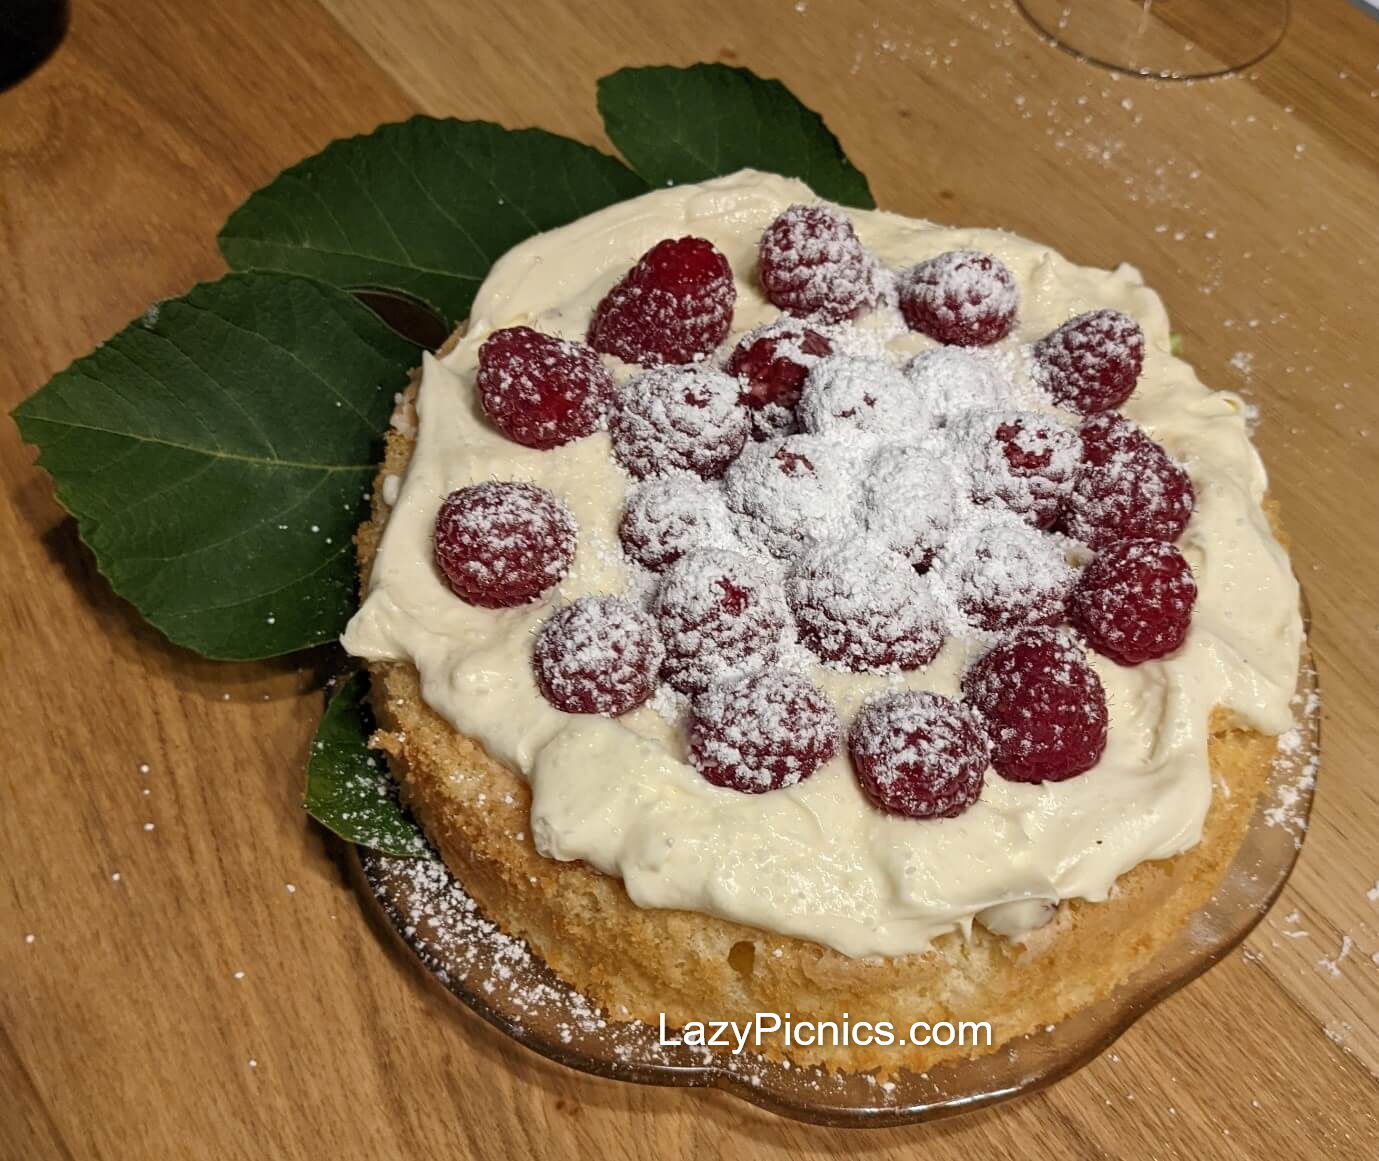
This easy sponge cake recipe was also very popular for trading tables...
to
raise money for our school and many other charities.
In fact, the cakes
were often sold before hitting the trading table!
Note... The sponge shown here is a small one, using half the mixture only...
and the remaining sponge cake mixture was used to make butterfly cakes... below.
A layer of fig jam, use your favorite jam, then a thick layer of cream... and this sponge sat on a huge fig leaf for a bit of fun!
Sponge Cake recipe... this will make two sponges to sandwich together...
or for you to make butterfly cakes.
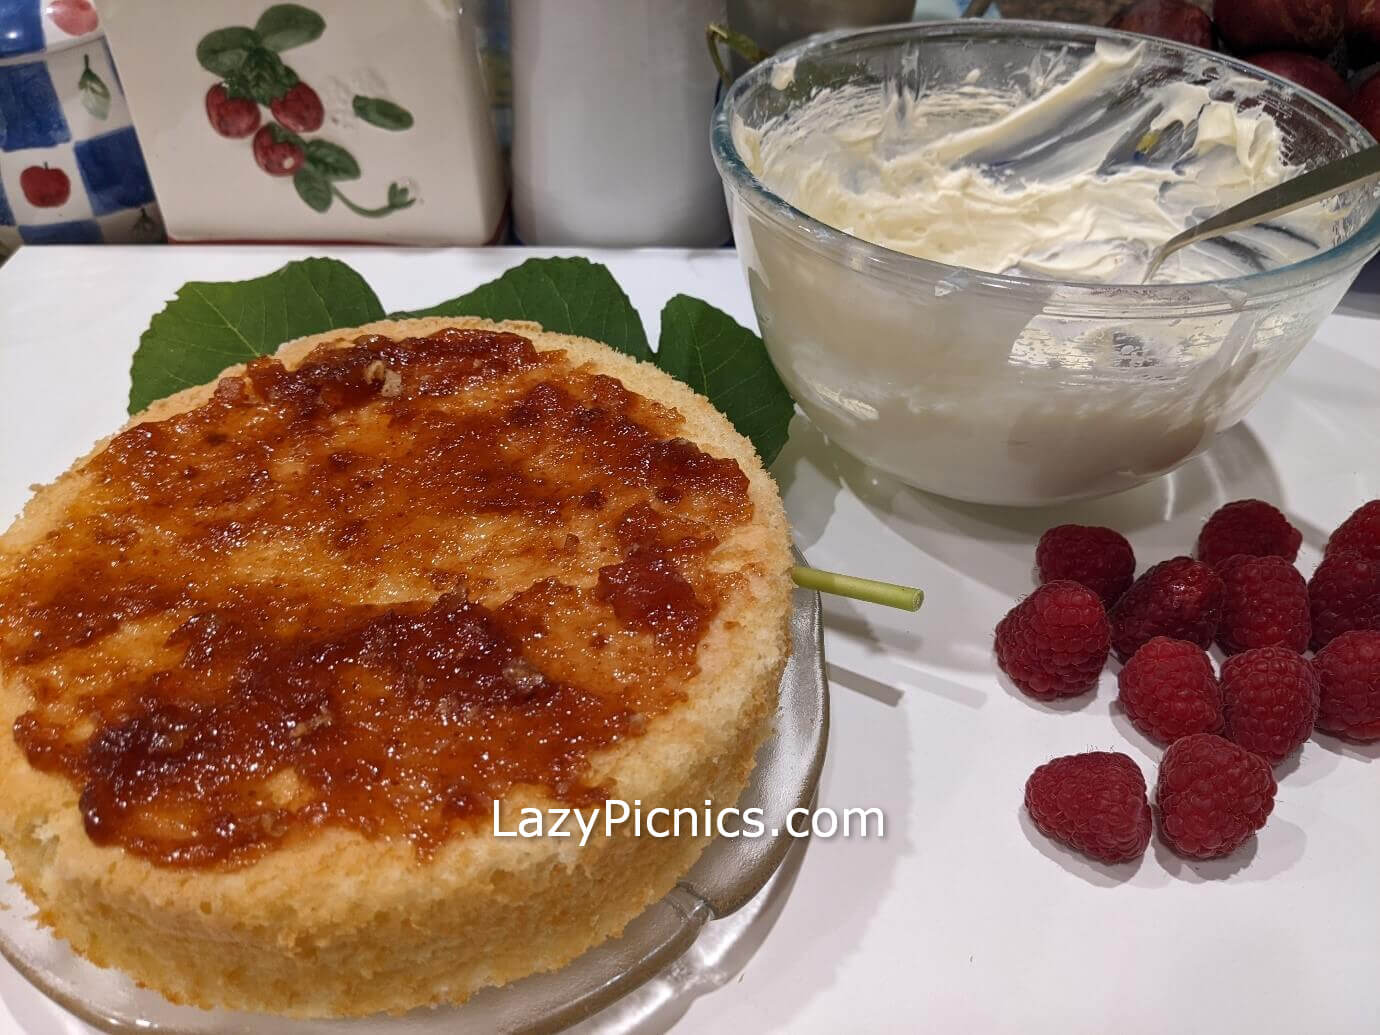
For easy picnic cake you will need...
- 4-5 eggs (depending on their size)
- 1 cup castor sugar
- 2 teaspoons butter
- 3 tablespoons milk
- 3/4 cup self raising flour
- Top the cup up with cornflour... 1/4 cup
- A little extra butter... and extra cornflour... for greasing and lining tins
- Pinch salt
Method....
- Grease 2 x 8" sponge cake tins with warmed butter.
- Sprinkle with cornflour and tap over the tin and tip off excess flour.
- In a large cake mixing bowl, to aerate and make your sponge light... Sift flour together, three times... Nance said this was very important for a light sponge!
- Heat butter and milk together, put aside.
- Separate eggs.
- Beat whites with a pinch of salt until soft but firm.
- Add sugar and beat until it dissolves... not too stiff.
- Add egg yolks and beat until light creamy yellow.
- Sift flour... already sifted 3 times... into beaten eggs... fold together.
- Then fold in cooled milk and melted butter... don't over mix, just fold together until just mixed.
- Pour half mixture into each sponge tin.
- Cook at 350-375c for 20 min.
To make a chocolate or coffee sponge...
Add 1 heaped tablespoon cocoa, or level tablespoon coffee.
Simple basic butter Icing for easy picnic cake
- 1 cup sifted icing sugar
- 1 teaspoon butter
- Approx 1 dessertspoon boiling water, or hot milk
Optional extras...
- 1 teaspoon of coffee powder
- 1 tablespoon cocoa powder
- the center of a juicy passion-fruit. Strain if you don't like the seeds
- Use strained lemon juice in the icing, instead of water or milk... gives a lovely lemony tang
To make...
- Sift icing sugar into a small bowl, add butter.
- Gently and slowly add the hot liquid (a teaspoon, then, drop by drop) onto the butter, while you mix with a knife... being careful not to add too much!
- Beat with your knife until smooth and spreadable, not watery and runny, although sometimes that is what you need for a cake with very thin icing!
- Less is best with the liquid... so add a few drops more of liquid, if needed, for easy spreading.
If you do add too much liquid, just top with a little more icing sugar... teaspoon at a time... or less.
When sponges are flavored with chocolate, or coffee... then make a butter icing with a touch of cocoa, or coffee, this is excellent.
This is often the best way to decorate when going out on a hot day for a picnic.
Nance often used Passion-fruit in her icing...
and we loved it.
How to make butterfly cakes...
Made from the mixture used in the easy sponge cake recipe.
If you are taking children to the
picnic, or perhaps someone has a birthday...
or you just want to have a
bit of fun... this is what to make!
There are many different butterfly cake ideas... they can be put into patty pans, but then you have paper to collect from the cakes.
They can be bigger, or smallish like these.
They can also be made from a cup cake... scoop out the center and make into wings.
You will find this is an easy way to make them.
You will need to...
- Make the sponge cake mixture above.
- Grease and dust patty tins with cornflour, ready to fill with sponge mixture.
- Set oven to 350-375C and bake for 12-15 minutes.
- They will be cooked when golden brown .... and you can gently push your fingers onto top of cakes and cakes spring back when your fingers are taken away... Just as you did for the sponge.
- Turn these easy picnic cakes out onto cooling racks.
To Assemble...
- Use half of small cakes for wings. Cut into half.
- Top one whole small cake with jam and dollop of cream.
- Place the thick side of cakes cut in halves, together... to form wings.
- Sprinkle with icing sugar... Icing sugar through a little strainer works well.
The Best Banana
Cake recipe... with prunes, or dates... a really easy picnic cake… I’ve found it! Hooray!
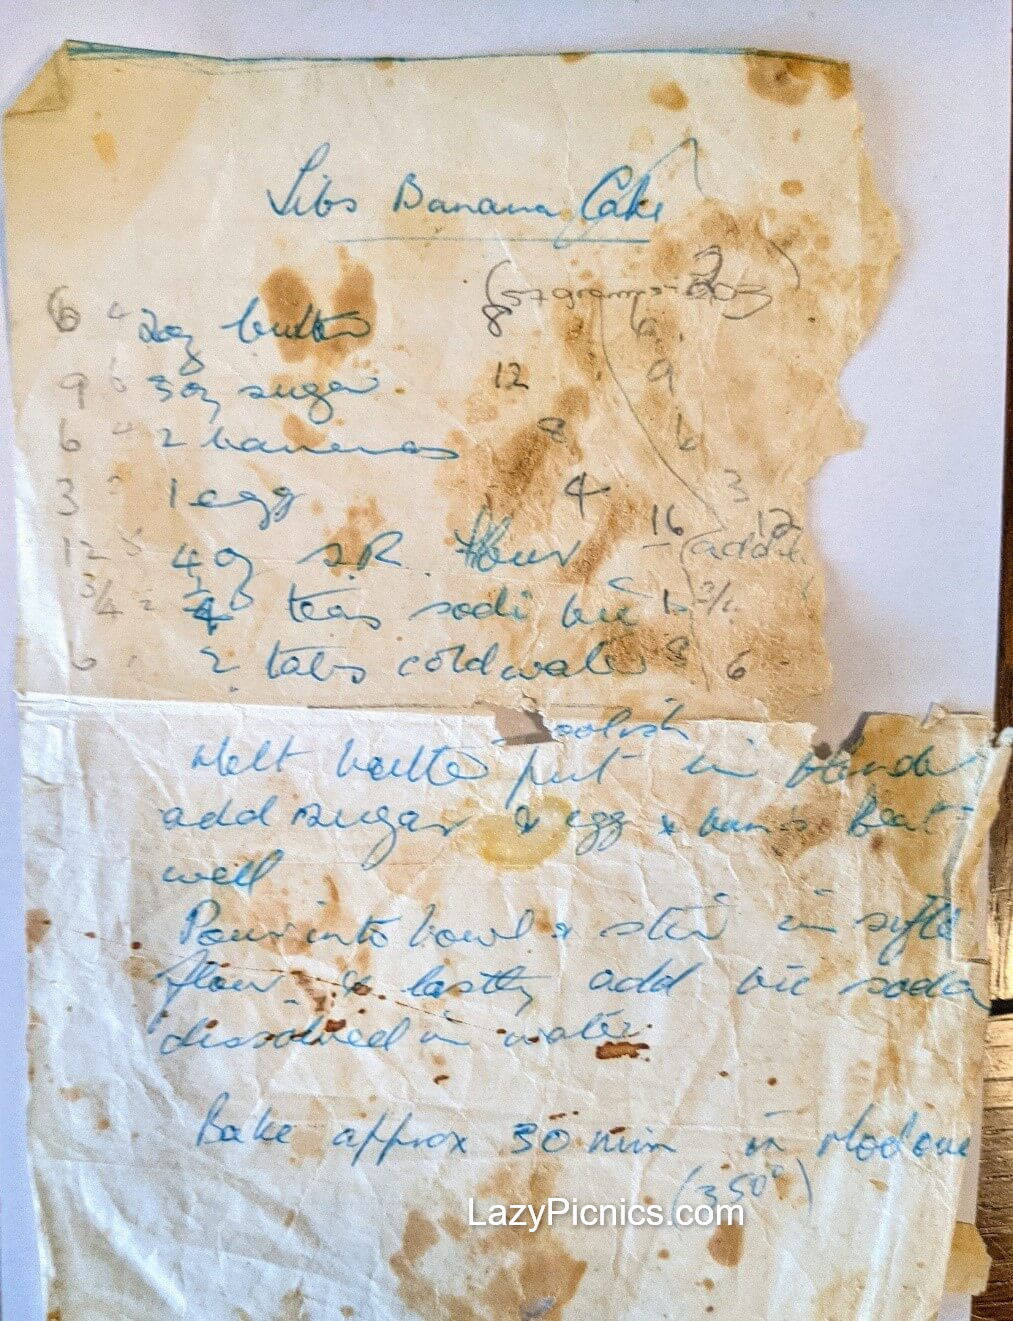
As you can see from this recipe, this is one of our very old favorites... an easy picnic cake recipe!
We have moved house and some recipes (my old favorites,
of course) went AWOL, so it is so exciting to find these old favorites… recipes
my kids and I have made many times! We now like prunes in this cake for extra "juicy-ness"
As you can see the original copy for Lib's Banana Cake has been extremely well used! Thankfully I had written a new copy some time ago. It came originally from a friend many years ago and is really very easy to make.
It is an almost fool proof recipe, but recently I did make a big mistake which I will share with you. It’s hard to believe that after all these years of making it that I could make such a mistake.
This cake has been baked for many picnics!
Banana cake mixture can be made into little cakes as well.
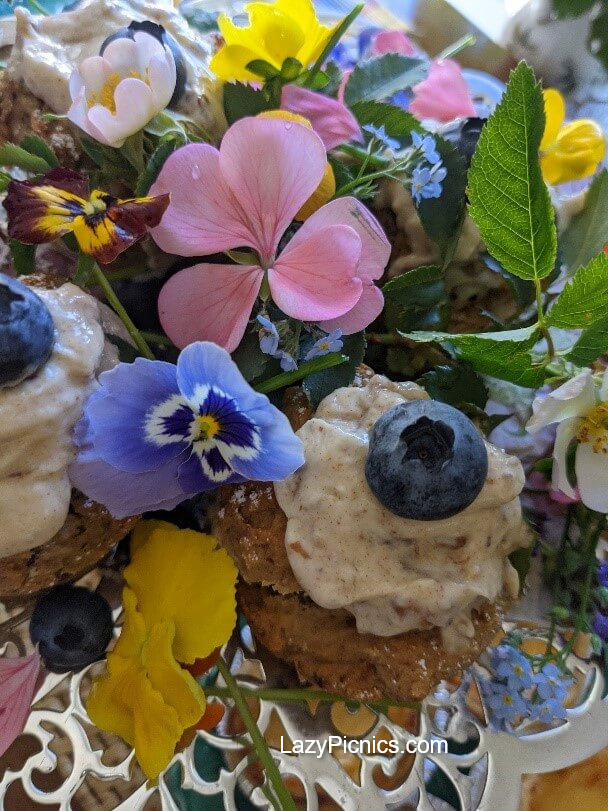
These little banana cakes were a special birthday treat for my sister LuLu.
They were arranged on our Mothers old silver cake stand... pretty, weren't they!
The cakes, topped with a blueberry, were tucked in between the pretty sprigs of edible flowers, for a bit of fun!

To make this very easy picnic Banana Cake with dates or prunes…
This can be made without prunes or dates and will still be lovely and moist and delicious... and so easy!
You will need…
- 120gm (4oz) butter
- 180gm (6oz) sugar
- 4 bananas… old soft bananas!
- 2 egg
- 250gm (8oz) self raising flour
- 15 soft pitted dates (chopped)... or pitted prunes (left whole), our favorite!... or both!
- 1/2 teaspoon Baking Soda
- 4 tabs cold water
To Put together....
- Melt butter
- In blender, or food processor... add butter, sugar, egg and soft bananas and dates... beat well.
- Pour into a bowl and sift flour on top of the beaten mixture.
- Stir all together.
- Last of all, add Baking Powder… dissolved in water... stir well.
- Bake for 30min in Moderate oven 175C (350F)
- To test that it is cooked, push a skewer in and if it has uncooked mixture on it, leave for a few more minutes until it comes out clean.
A rectangular log tin works well for a cake going to a picnic.
Top with cream cheese topping
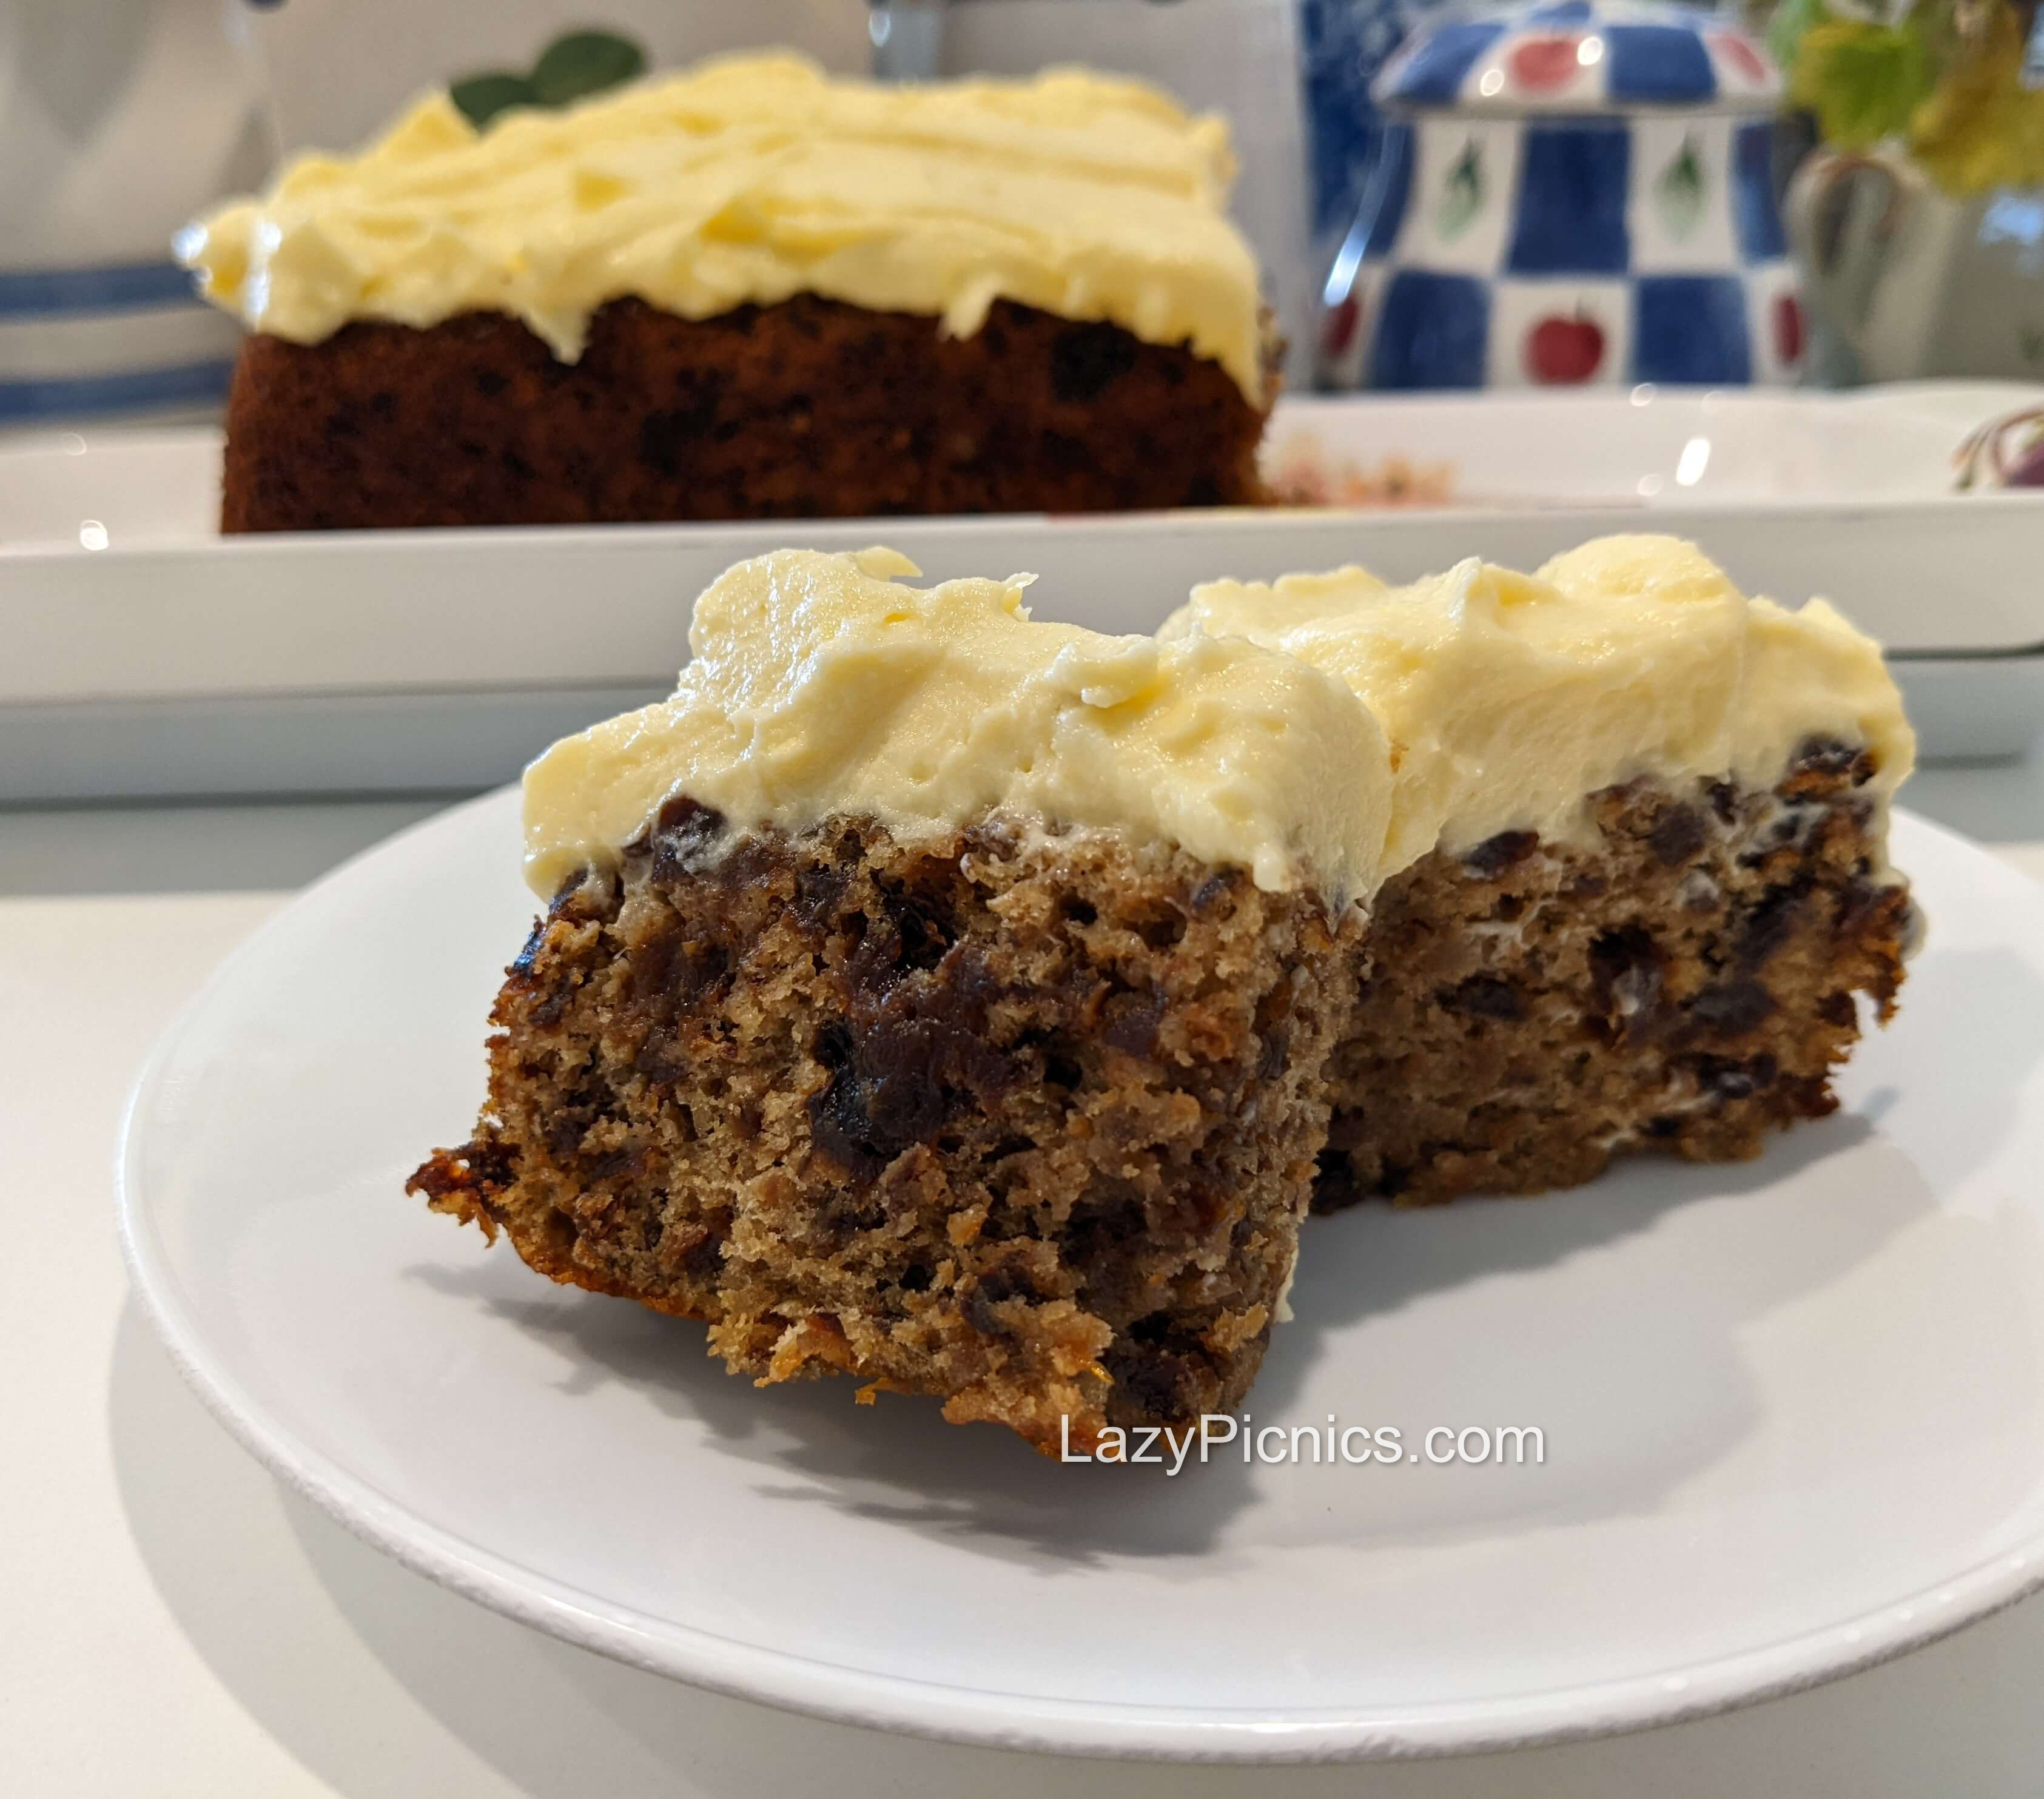
This makes it easy to cut slices to be shared around.
This has to be one of the best favorite cakes, with prunes!
Cream Cheese Topping...
This topping is great for carrot cake and muffins too... any easy picnic cake really!
- 5 tablespoons cream cheese
- 5 tablespoons butter
- Up to 12 tablespoons icing sugar... less if you wish
- 1/2 teaspoon Vanilla Essence
Whizz altogether in a food processor, use a spatula or knife to cover top of cake... when it's cold.
It will melt if cake is still hot!
Leave as it is ... or sprinkle nuts, or grated chocolate, over or through mixture.
Maybe sprinkles over for children.
TOP TIPS…
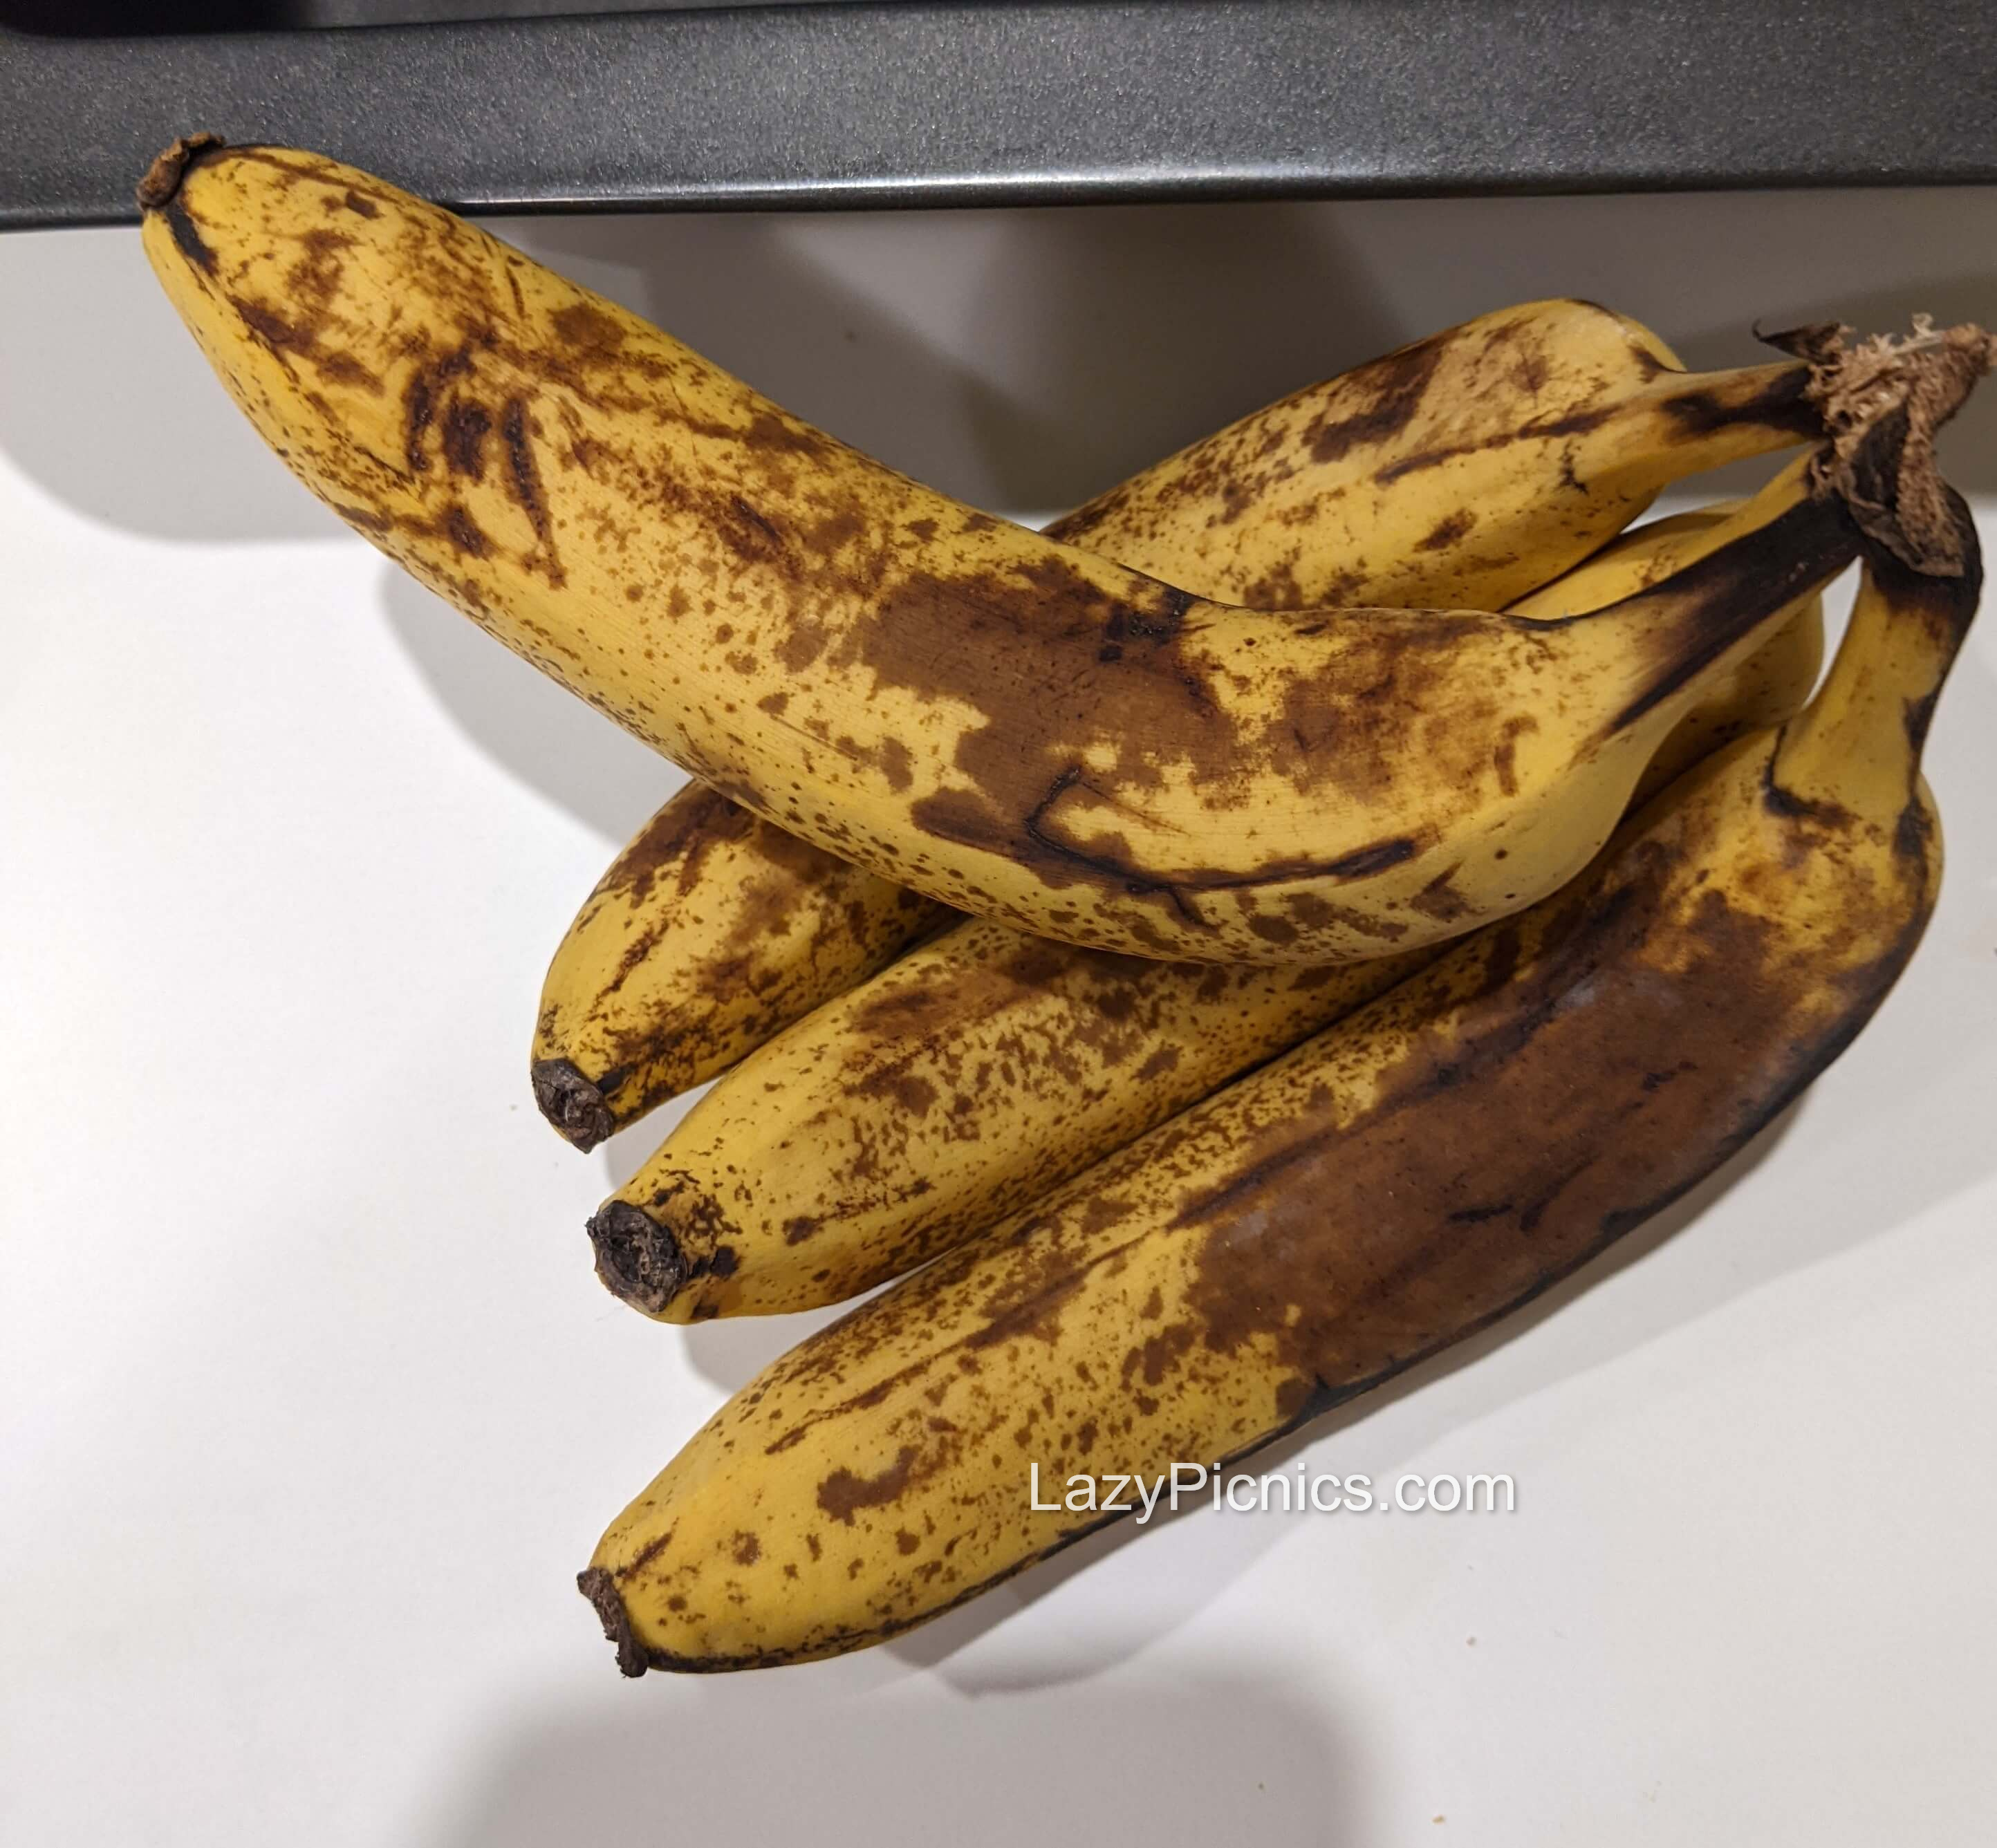
- The mistake I made recently was to use fresh hard bananas. I was in a hurry and couldn’t find old bananas, so thought fresh bananas would be fine… BIG Mistake!
- You need to use old soft bananas for this cake. Usually, I freeze the bananas which have ripened too much to eat while fresh. When I have enough in the freezer, that’s when I make a cake.
- The cake I made was quite dry and hard… OK to eat but nothing like the moist delicious cake I usually make. Really it was banana bread and needed butter... then it was yum!
- It was good to make the mistake before showing you this old favorite... helps to make sure you don't make the same mistake!
- Like the chocolate cake above it is also a good recipe to make in a log cake tin, or in a muffin pan... a good easy picnic cake.
- This cake and the cream cheese topping freeze very well
This
is the very popular recipe...
Whole Orange and Almond cake, without flour.
It has been used for some of our large
birthday picnics, but is equally good for smaller picnics too.
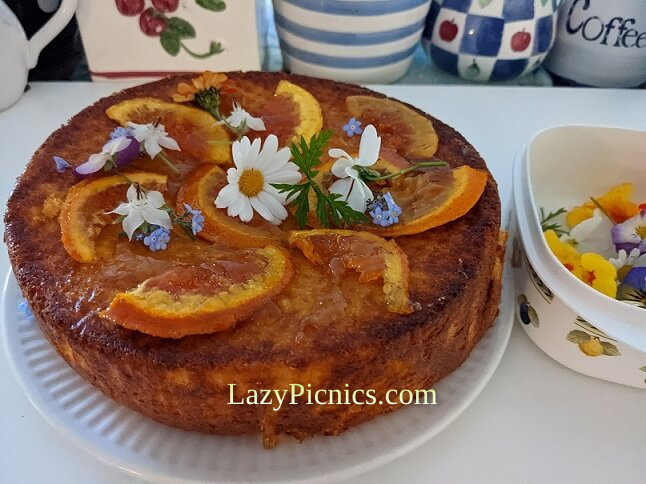
It is easy to make and freeze, so can be made beforehand.
I baked many of these for one very large birthday picnic.... and could cook, then freeze, over many days... when I had time.
It is quite a rich cake... goes well with a big dollop of cream or yogurt!
They will be back for seconds!
Recipe for Whole Orange Cake.... for 10-12 people
- 2 whole oranges... not too big, approx. 8cm across... leave peel on
- 6 eggs
- 1 1/2 cups white sugar
- 1 teaspoon baking powder... check the container if you need Gluten Free
- 1 1/4 cups almond meal
Place your 2 whole oranges in a saucepan and cover with water.
Boil gently for two hours, check they don't boil dry!
Then before putting the cake together...
... towards the end of oranges boiling
- Heat oven 190C or 375F
- Grease your 22cm /10" round spring form cake tin with butter... base and sides.
- A slightly smaller tin 8"/20cm... will make a smaller but higher cake... you have choices!
- Line base with baking paper... grease this with butter too.
- Add sliced candied orange topping to cake tin base... how to make below
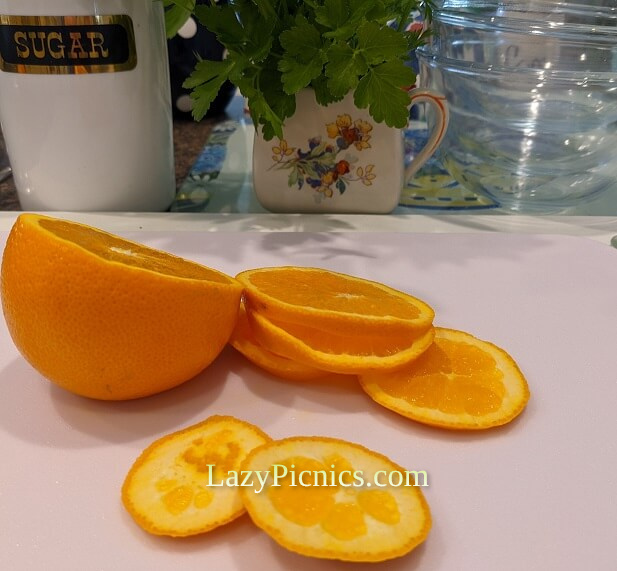
To make orange topping... with 2 extra oranges.
Slice, very thinly, 2 washed oranges... with peel left on.
Just use the nice slices not the pithy bits on the end.
These slices will go at base of the cake to cook... when turned out it will be the top!
- 2 cups of cold water into 2.5 liter shallow saucepan
- Add 2 cups sugar
- Over med heat stir the sugar till dissolved
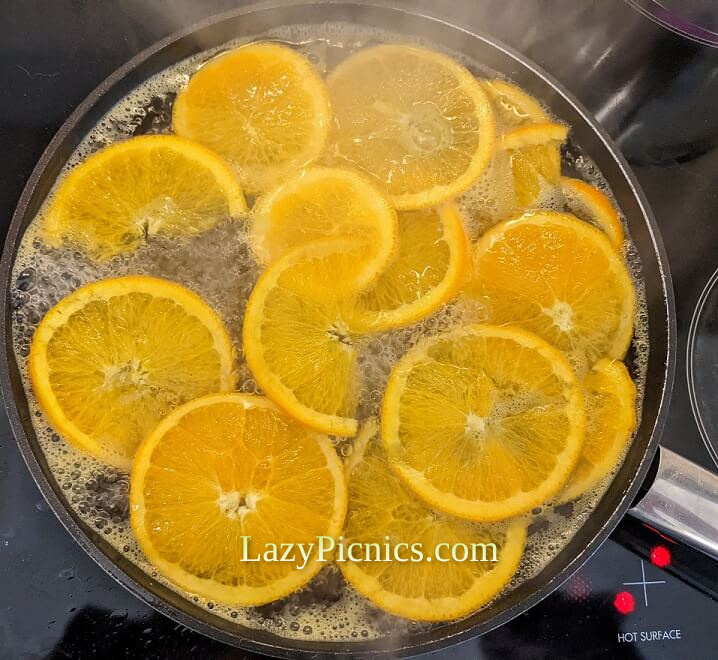
- Add thinly sliced oranges... trying to place side by side, not overlapping
- Simmer for 20min, turning orange slices a couple of times, until they are soft and candied.
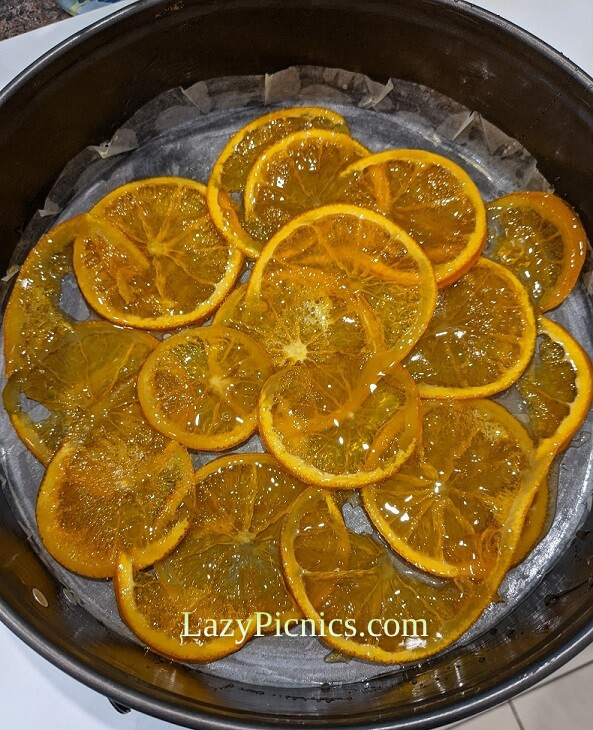
Arrange these slices over the bottom of the cake tin
on the greased baking paper
and pour the cake mixture over to cook.
Or...
As done above, cut the orange slices in half and "scatter" across the top of the cake after cooking.
A few almond slithers or walnuts can be scattered too, or pretty flowers... your choice!
To make the cake...
- Drain oranges which have boiled for 2 hours... cut in half and take out any pips.
- Chop into pieces and puree with skin on.
In a large bowl...
- Beat eggs and sugar until thick and pale.
- Mix in baking powder.
- Stir in orange puree... approx 1 1/2 cups
- Gently fold in almond meal
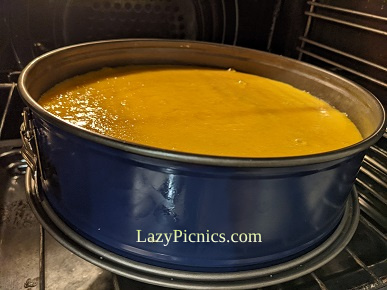
- Pour cake batter gently into prepared cake tin... on top of cooked sliced oranges.
Bake in oven for approximately 40min
Bake until a knife inserted into middle of the cake comes out clean.
If it browns too much, if cooking longer... just cover with buttered foil... it can stick if not buttered!
- Cool in cake tin... it will shrink a little and is beautifully soft inside.
- Ease out gently onto serving plate
- Gently peel baking paper off, being careful not to rearrange orange base.... your decoration!
- It is a bit of a sticky moist cake... and not a high cake, unless you cook it in a smaller tin.
- This cake was cooked in an 8"/20cm tin, so is the higher version.
- A lovely dollop of cream goes really well with this yummy cake!
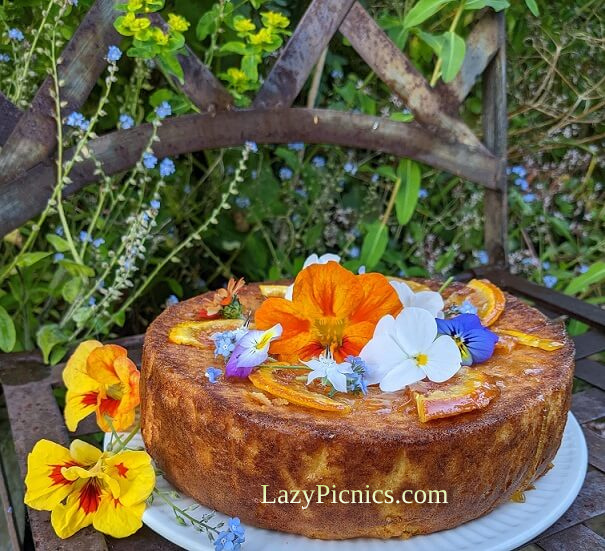
You can sprinkle with slithered almonds if you wish,
but it does look good with candied orange rings with the thick juice they were simmered in, drizzled over... as has been done here.
A few walnuts, could be scattered too, or pretty flowers... your choice!
Leap Home... Fill the baskets!
Please join us on Pinterest... and Facebook
